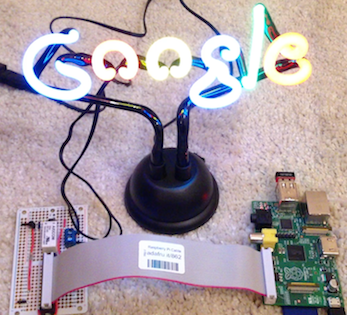
You just made a funky neon sign flash in my living room.
How? I have just completed my latest project which is a neon lamp which lights up every time someone visits my website. It’s controlled by a little relay board I built out on an Adafruit permaproto board and connected to a Raspberry Pi. The Raspberry Pi is running a simple python script which generates an event every time someone loads this page. I’ve made the part which integrates with the website open for anyone to use so you can build this out for yourself - have fun!
Building the Relay Board
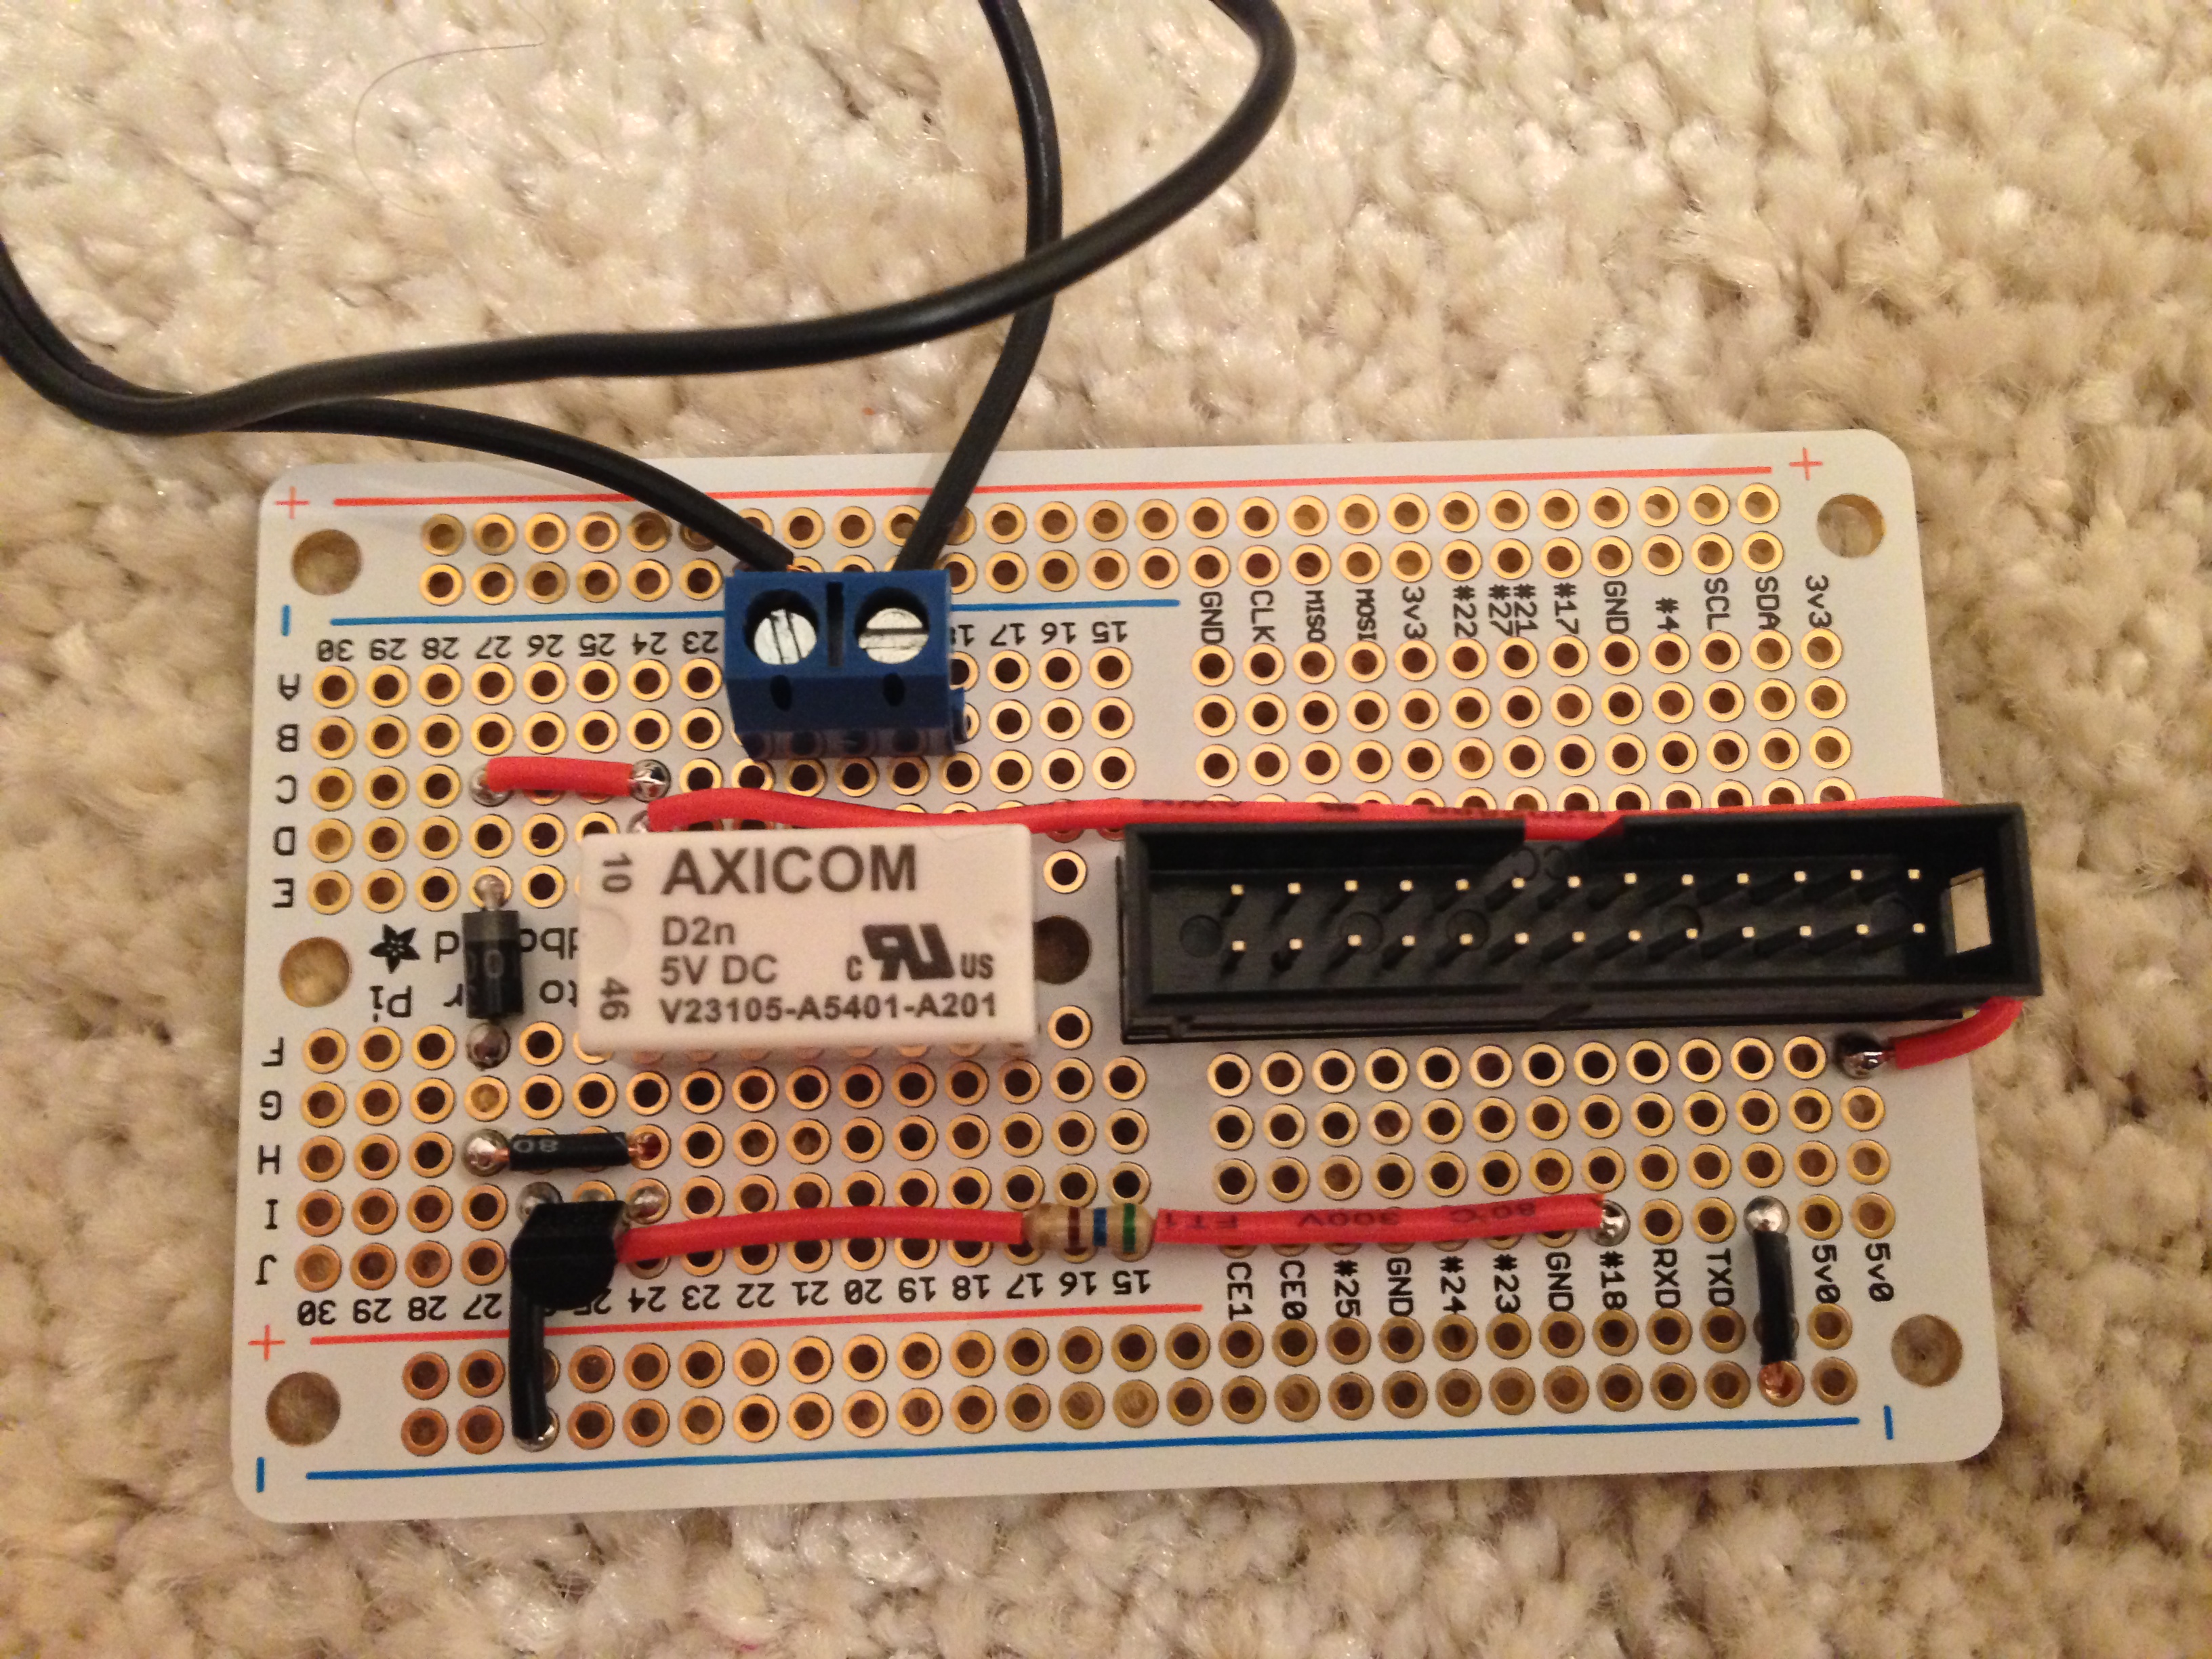
The relay board connects to the Raspberry Pi General Purpose I/O (GPIO) pins via a ribbon cable. Adafruit sells a Pi Cobbler which makes it easy to break out the GPIO pins on a breadboard for prototyping. Once you’re happy that the prototype is working, transferring a breadboard layout to the permaproto board is quite simple (the soldering is easy and you just copy what you had on the breadboard).

Here is the circuit diagram for the relay board - we drive the relay coil from the 5V supply which is switched on and off using a transistor controlled by one of the digital out pins (I used pin 18). The diode prevents reverse voltage as the relay switches off from damaging the Pi.
You can see step-by-step instructions on how to assemble the relay board on this spark.
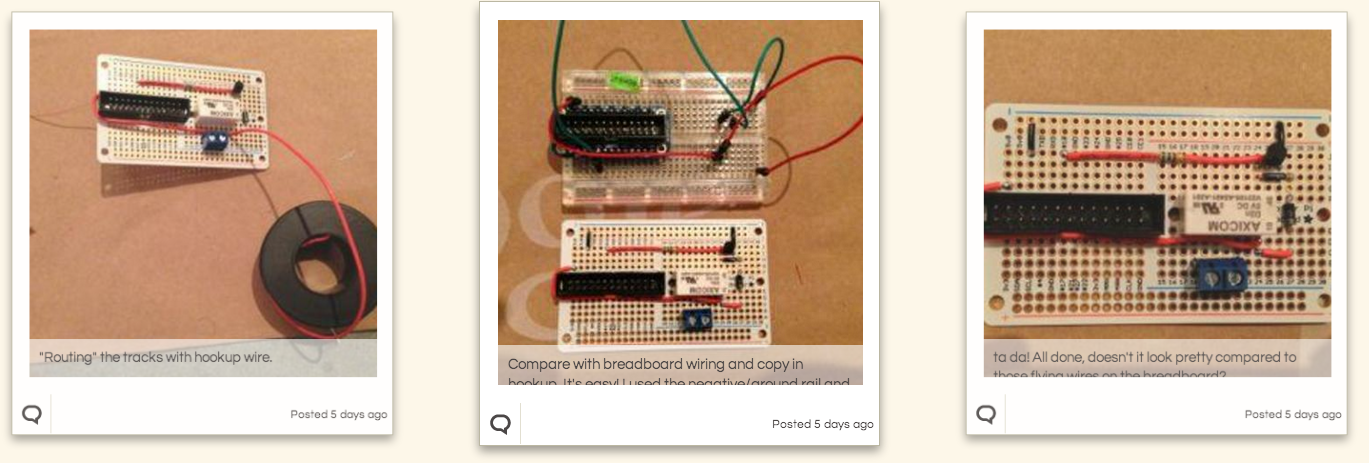
Spark: Raspberry Pi relay board.
Connecting the lamp
You can use any lamp or electronic device powered with a low direct current (anything which plugs in to a USB port or runs on batteries is ideal). DO NOT attempt to use a mains powered lamp. Even if your relays is rated for 110V, the prototyping board has exposed connections and mains electricity can kill.
Simply cut one side of the power cable and attach to the switched part of the relay (I used screw terminals so I can connect and disconnect as I please).
RPi test program
The following little test program will drive your lamp on and off every 2 seconds to verify everything is working.
I used the Adafruit Occidentalis distribution of Linux. You can also use Raspbian. Follow these instructions to get the Pi set up, or use the quickstart below:
sudo apt-get install python-rpi.gpio
Run the following Python program:
import RPi.GPIO as gpio
import time

gpio.setmode(gpio.BCM)
gpio.setup(18, gpio.OUT)
while True:
  time.sleep(2)
  gpio.output(18, True)
  print "True"
  time.sleep(2)
  gpio.output(18, False)
  print "False"
Each time False is printed, the lamp should turn on and off again when True is printed.
Set up your website
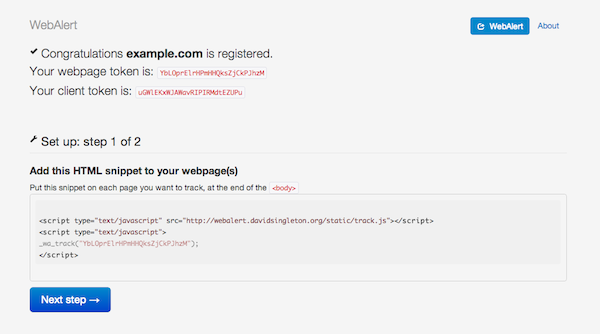
This bit is easy. Visit http://webalert.davidsingleton.org/, register your web page(s) and follow the instructions to add code to your web page.
What does webalert do? It’s a simple service hosted on Heroku which serves up a javascript script which adds a 1 pixel, transparent, image to your webpage with a unique URL. When the visitor’s web browser loads that image, the service sees the event and publishes a message to a Redis pubsub queue which the Raspberry Pi listens to. You don’t need to write or install this, you can simply reuse mine.
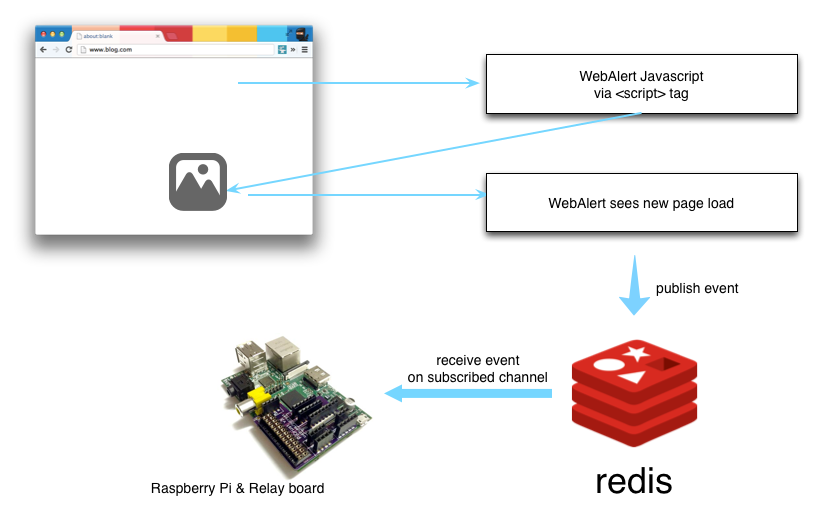
Run the client on your Pi
The webalert client uses redis to subscribe to events generated each time your website is loaded. First, install the redis python module:
sudo pip install redis
Then, in a new directory, get the webalert code:
git clone https://github.com/dps/webalert.git
And write a simple client which uses it - e.g.:
Finally, run passing your webalert client token on the command line:
sudo python weblight.py [your token]
Ta da! clickety click flashy flash, your website in your living room.
Comments? Join the discussion on Hacker News.
Want to get started with RPi + electronics yourself? Here's some stuff to buy (affiliates links, but the kits and prices are good).
 | 
Adafruit 955 Raspberry Pi (Electronics) Starter Project Kit |